
Self-Storage Move-In Day Checklist: 5 Steps For Success
Move-in day is almost here! Before moving into a storage unit, there are a few essential steps and considerations to make the process as easy as possible.
Here’s what you need to know to make your self-storage move-in experience a breeze and ensure the safety and accessibility of your belongings. Let's dive in!
- Complete Your Rental Agreement
- Line Up Your Insurance
- Find the Right Lock for Your Unit
- Prepare for Moving
- Pack and Organize Your Storage Unit Like a Pro
Step 1: Complete Your Rental Agreement
To get started, you'll need to complete a rental agreement. If you’re renting from us, the process is quick and easy, and you can do it online from the comfort of your own home. Here's a step-by-step guide on how to complete your rental agreement and secure your storage unit.
Visit the Website
The first step is to visit our website. Here, you'll find all the information you need about renting a storage unit and moving in.
Navigate to the Reservation Page
- Once you're on our website, head to the reservation page. You can find it under the "Storage Locations" tab.
- Next, click “Select” to choose the storage unit you want based on your size requirements. (Not sure which size unit you need? Use our handy virtual size guide.)
From here, you have two options:
1. Reserve This Space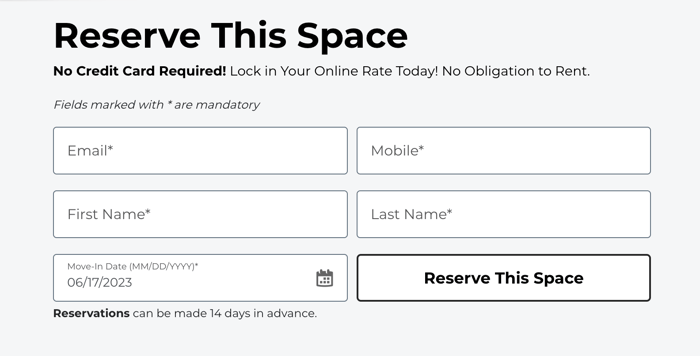
Reserving a space is simple and allows you to hold a spot ahead of time—no credit card is required. It is not the same as renting a unit, and you will still be required to pay later.
On this page, you'll need to provide some essential information, including your name, contact details, and desired move-in date.
2. Rent a Space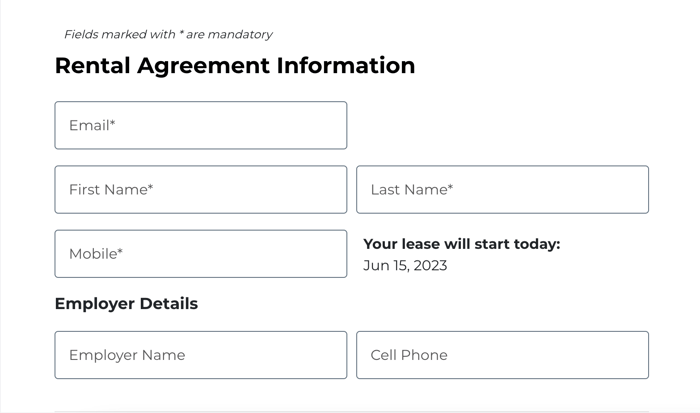
If you’re ready to rent, scroll down to the button that says “Rent Now” and fill out the page that says “Rental Agreement Information,” like the one above.
You’ll be prompted to fill out essential information, provide renter verification, and choose your insurance on this page as well.
Renting a unit through this method does require entering your credit card information.
Sign the Agreement Electronically
Once you've reviewed the terms and conditions, it's time to sign the rental agreement electronically to reserve your storage unit.
Need some help? We’ve got you. Our customer service team is always available to help.
Step 2: Line Up Your Insurance
While storage facilities strive to provide a secure environment, accidents or unforeseen events can still occur. That's why many facilities require renters to have an insurance policy to guarantee the safety and security of their stored items.
Understand Your Facility's Insurance Policy
Begin by checking if the storage facility offers any insurance coverage options. Some facilities provide their own insurance plans or have partnerships with insurance companies. Review the terms, coverage limits, and any exclusions that may apply. Familiarize yourself with what the facility's insurance does and does not cover.
Check Your Homeowner's or Renter's Insurance
In many cases, your existing homeowner's or renter's insurance policy might extend coverage to items stored off-site. Reach out to your insurance provider to understand if your policy includes off-site storage protection. If it does, ask about the specific coverage limits and any additional requirements like deductible limits.
Consider Obtaining a Separate Storage Insurance Policy
If your existing policy doesn't provide adequate coverage for your stored items, or if you don't have homeowner's or renter's insurance, you may want to consider obtaining a separate storage insurance policy. These policies are specifically designed to protect belongings stored in self-storage units and offer coverage for various risks, such as theft, fire, water damage, and natural disasters. Check with your storage facility first to see what type of coverage you may want or need.
Evaluate All Your Options
Research different insurance providers specializing in storage insurance and compare their policies. Look for reasonable premiums and favorable terms. Make sure to read customer reviews and check their reputation for prompt and fair claims processing.
Document and Photograph Your Belongings
Before moving your items into the storage unit, make sure you have a detailed inventory. Document the condition of each item and consider taking photographs. This documentation will serve as valuable evidence in case you need to file an insurance claim in the future. It also serves as a good reminder of what’s inside your unit to help you keep track of everything and stay organized.
Familiarize Yourself with the Claims Process
After obtaining insurance, whether through your facility or through a private company, thoroughly review how to process claims, so you’re not caught off guard in case of an emergency. With our insurance plans, you can benefit from the convenience of modern technology, including text updates for insurance claims.
Step 3: Find the Right Lock for Your Unit
When it comes to securing your storage unit, choosing the right lock is essential. Of course, all of our units are monitored by premium security with 24/7 surveillance and on-site professional managers, but a good lock is still a must.
There are two main types of locks to consider: traditional locks and digital locks. Here’s a look at both.
Traditional Locks
Our Pick: Disc Locks
Disc locks are widely regarded as one of the most secure options for storage units. These locks have a circular shape and a shackle that is resistant to cutting or tampering. The design of disc locks makes them difficult to pick, providing enhanced security for your unit.
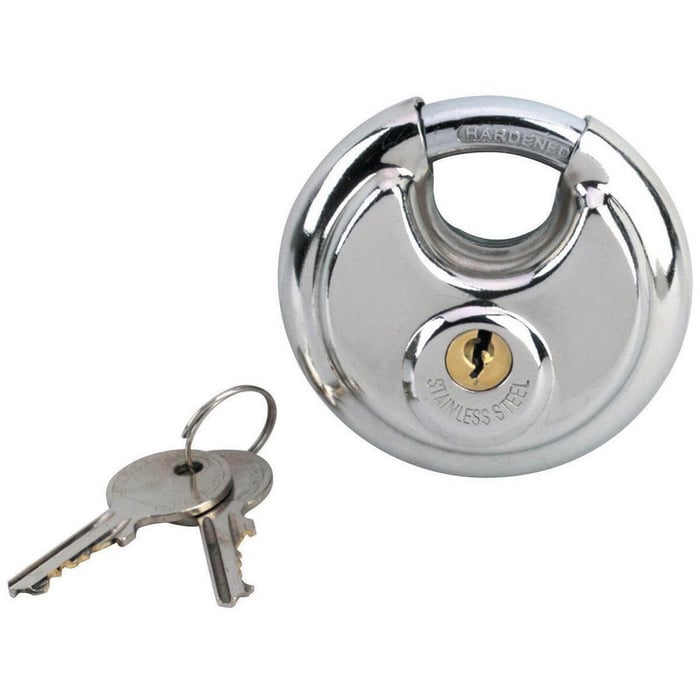
Look for a heavy-duty lock made of hardened steel or brass that’s built to withstand external forces. If your storage unit is exposed to the elements or is located in a climate with extreme weather conditions, opt for a lock that is specifically designed to withstand the elements. Weather-resistant locks are built to resist rust, corrosion, and damage caused by moisture or temperature fluctuations. These locks are durable, secure, and easy to use. To make move-in simple, you can find the lock you need right in one of our facilities.
Keyless Digital Locks
Keyless digital locks are the cutting-edge future of locks. They’re revolutionizing self-storage by enabling customers to effortlessly access their units using their smartphones, eliminating the need for traditional keys. While there are digital locks out there, traditional locks are still the most trusted, secure option for self-storage.
Double Check the Size
Ensure that the lock you choose fits the latch and has enough clearance to be easily inserted and removed. Measure the dimensions of the latch before purchasing a lock to avoid any compatibility issues.
For more on how to choose the right lock for your storage unit, check out this article.
Step 4: Prepare for Moving
Plan ahead and organize your belongings to make the most of your storage space and avoid any potential mishaps on move-in day.
Declutter and Sort
First things first: Before moving your belongings into a storage unit, take the opportunity to declutter and sort through your items. Separate them into categories such as keep, donate, sell, or discard. This step will help you reduce the number of items you need to store and make the packing process more manageable.
Gather Packing Supplies
Stock up on essential packing supplies such as sturdy boxes in various sizes, packing tape, bubble wrap, packing peanuts, and furniture covers. Having the right supplies on hand will help protect your items during transit and while in storage.
Label, Label, Label
Label each box with its contents to make it easy to locate specific items when needed. Consider color-coding or numbering boxes for additional organization.
Disassemble Furniture
If possible, disassemble large furniture pieces to save space in your storage unit. Keep all screws, bolts, and other small parts in labeled bags or containers to ensure they don't get lost.
Create an Inventory List
Make a detailed inventory list of all the items you're storing. Note down the contents of each box and any valuable or high-risk items. This inventory list will serve as a reference in case you need to access or retrieve specific items from storage.
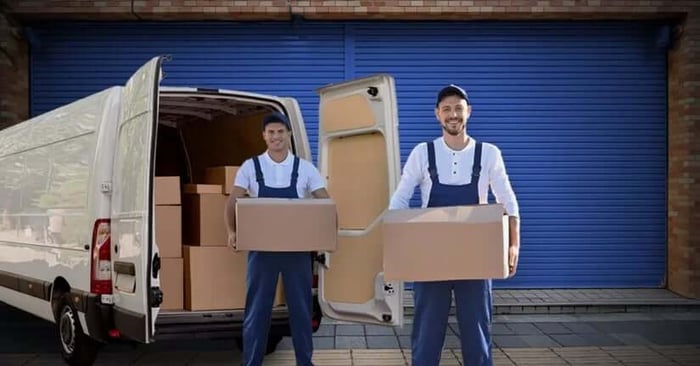
Reserve a Move-In Truck
On the day of your move, remember to reserve a free move-in truck if your storage facility offers this service. Most of our facility provides spacious move-in trucks with large cargo areas, making it convenient to transport your belongings. (Another reason why our facility is a neighborhood favorite!)
The trucks are equipped with automatic transmission and air conditioning, ensuring a comfortable driving experience. To further protect your items during transit, we also provide moving blankets and a dolly. Load up your belongings and enjoy a hassle-free journey from your home to your storage unit.
For more guidance on preparing for your move, check out these questions to ask yourself before moving.
Step 5: Pack and Organize Your Storage Unit Like A Pro
Organizing your storage unit is essential to maximize the space and ensure easy access to your items when needed. Make the most of your storage unit with these simple tips and tricks.
Plan Your Layout
Before you start actually moving your items into the storage unit, take a moment to plan your layout. Consider which items you may need to access more frequently and place them towards the front. Leave pathways between boxes and furniture to allow easy navigation within the unit.
Utilize Sturdy Boxes and Containers
Pack your belongings in sturdy boxes and containers to protect them from damage. Use uniform-sized boxes whenever possible, as they stack more efficiently. Consider investing in plastic bins that provide added protection from moisture and pests.
Take Advantage of Vertical Space
Utilize the vertical space in your storage unit by stacking boxes and furniture vertically. Place heavier and sturdier items at the bottom and lighter items on top. Use shelving units, if available, to create additional levels of storage.
Leave an Aisle for Access
Ensure that you have a clear aisle or pathway within your storage unit. This will allow you to easily access items stored towards the back without having to move everything around.
Protect Fragile Items
Wrap fragile items in bubble wrap, packing paper, or blankets to provide cushioning and prevent breakage. Place them in boxes labeled as "Fragile" and stack them carefully to minimize the risk of damage. If you need any packing supplies, we’ve got you covered with a selection of whatever you may need on-site in our facilities.
For more detailed guidance on packing and organizing your storage unit, check out this video.
Enjoy the Convenience of Self-Storage
Renting a storage unit is a convenient, cost-effective solution for storing your belongings. By completing the rental agreement, lining up your insurance, choosing the right lock, preparing for the move, and packing and organizing efficiently, you can make the move-in process smooth and hassle-free.
At our facility, you’ll also get access to our team of professionals to help answer any questions you may have. We’re here to help make sure you have the best possible storage experience from day one.
Happy storing!